Remove Background from Any Image Online Free: The Complete Guide
Remove the background from any photo in seconds and get a clean transparent PNG, free, with no signup required.
Why transparent backgrounds matter
Look at any product photo on Amazon or Daraz and you will notice the same thing: a clean white or transparent background with nothing distracting the eye. Now open your own camera roll and try photographing the same product. You get a kitchen counter, a shadow, maybe a cat walking into the frame. That gap between a professional-looking image and what your phone gives you is mostly about the background.
Transparent backgrounds are useful far beyond online stores. A logo needs to sit on a colored website header without an ugly white box around it. A YouTube thumbnail pops when the person is cut out and placed over bold text. A LinkedIn profile picture looks sharper when the messy room behind you disappears. Pitch decks, resumes, invitations, memes: once you can lift the subject out of a photo, you can put it anywhere.
Until recently, that meant learning Photoshop or paying someone who knows it. A single clean cutout could take a designer twenty minutes and cost real money. A free background remover changes that completely. You upload a photo, the AI separates the subject from the background in seconds, and you download a transparent PNG. This guide walks you through exactly how it works, how to get clean results, and what to do with the image afterward.
How AI background removal actually works
The technology behind a modern background remover is called image segmentation. In plain terms, the software has looked at millions of photos during training and learned what people, animals, cars, and common products look like. When you upload your picture, it does not search for a magic edge. It predicts, pixel by pixel, which parts of the image belong to the subject and which belong to the background.
The tricky part is the boundary. A hard edge like the side of a box is easy. Hair, fur, glass, and motion blur are hard, because a single pixel there can be half subject and half background. Good models output a soft mask instead of a sharp cut, which is why decent results keep a few semi-transparent pixels around hair instead of chopping it into a helmet shape. That softness is what makes the cutout look natural when you place it on a new background.
All of this happens in seconds because the heavy math runs on optimized neural networks. You never touch a selection tool or draw a single outline. The practical takeaway is simple: the AI is only as good as the photo you give it. A clear subject with decent contrast against its background will come out clean almost every time, which brings us to the actual process.
How to remove a background online, step by step
Open the Background Remover in your browser. There is nothing to install and no account to create. You will see an upload area: drag your photo onto it or click to pick a file from your device. JPG and PNG files both work, and a photo around 1000 to 2000 pixels wide gives the best balance of quality and speed.
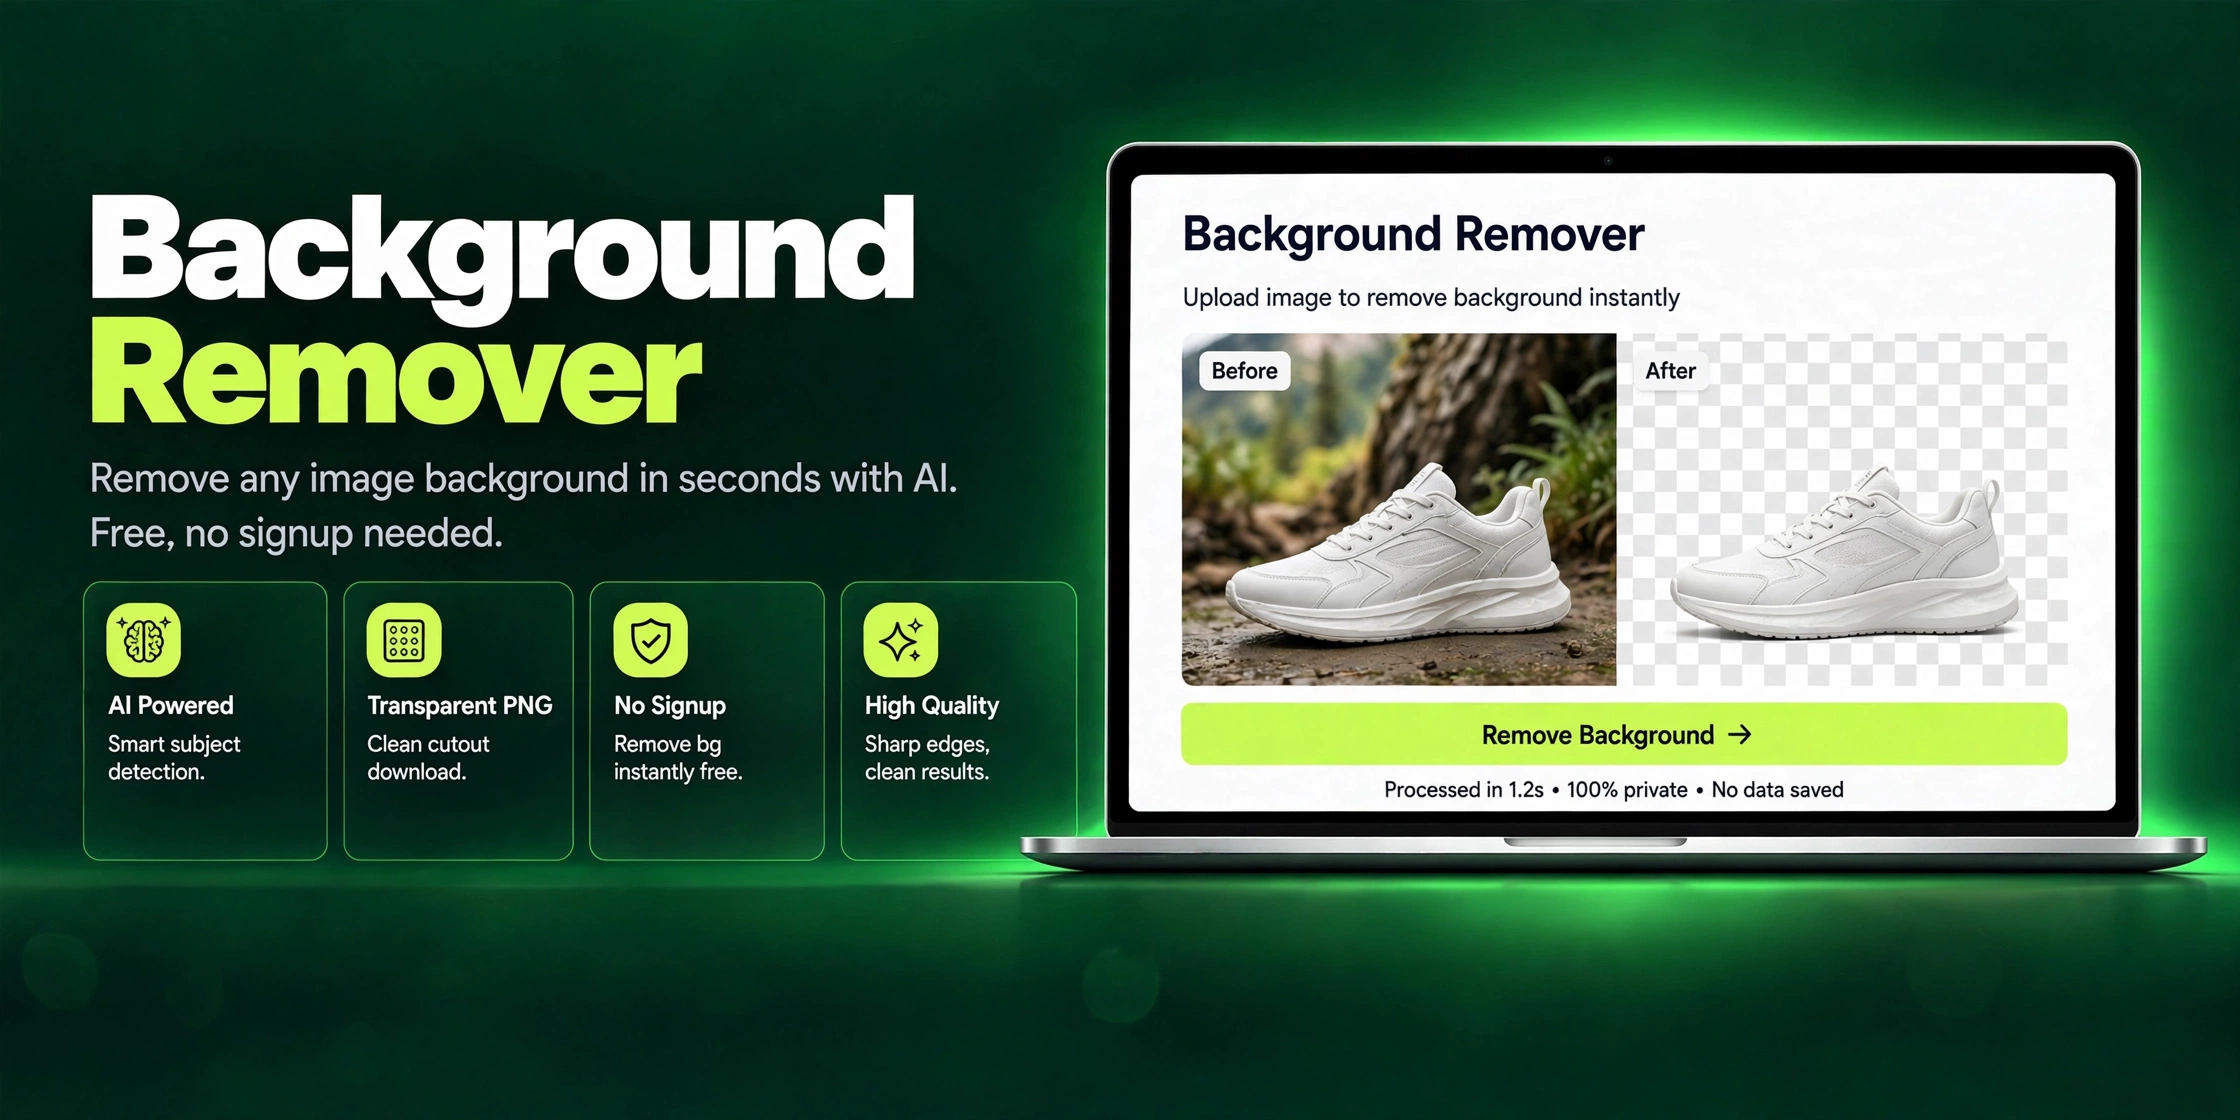
Once the image loads, the tool analyzes it automatically. This usually takes a few seconds. You will see a preview of your subject on a transparent background, shown as the classic checkerboard pattern. Compare the edges with the original. If the main subject is cleanly separated, you are done. If something looks off, like a shadow got included or a piece of the subject got cut, try a different photo with better lighting rather than fighting the current one.
Hit download and you get a PNG file with a transparent background. PNG is important here: JPG files cannot store transparency, so if you save as JPG the background comes back as white. Keep the PNG. It will be larger than your original JPG, which is normal, and later in this guide we will fix the file size.
Where a transparent background actually helps
Ecommerce is the biggest use case. Marketplaces like Amazon, eBay, and Daraz require or strongly prefer product photos on plain white backgrounds. Sellers who photograph products at home can remove background from image files and drop the product onto white in seconds, instead of building a lightbox setup. One clean listing photo can genuinely change how a product sells, because buyers click on images that look professional.
Profile pictures are next. A headshot taken against a living room wall looks fine until you put it on a company team page or a LinkedIn profile next to colleagues with studio photos. Cut yourself out, place the result on a soft neutral background, and the photo instantly looks intentional. The same trick works for YouTube thumbnails: creators cut themselves out of a frame and layer the cutout over bright colors and big text, which is half of what makes a thumbnail clickable.
Then there are presentations and documents. A product screenshot with its gray background pasted into a white slide looks sloppy. The same screenshot with the background removed sits cleanly on the slide. Marketing teams use transparent cutouts for ads, social posts, and stickers. Students use them for project covers. Once you start noticing, you see transparent-background images everywhere, and most of them took someone less than a minute to make with a photo background eraser.
Tips for clean, sharp cutouts
The single biggest factor is contrast between your subject and what is behind it. A person in a dark shirt against a dark curtain is hard for any AI to separate. The same person against a plain light wall is easy. You do not need a studio: stand a few steps away from the wall so your shadow does not fall on it, face a window for soft daylight, and keep the background simple. Busy patterns, mirrors, and glass tables behind the subject all confuse the model.
Hair and fur deserve special mention because they are where most cutouts fail visibly. Long loose hair against a textured background will always be a challenge. If you are photographing a person specifically to cut them out, tying hair back or shooting against a solid background helps enormously. For pets, a side profile with the ears clearly separated from the background gives much cleaner results than a head-on shot where the ears blend into a dark sofa.
Resolution matters more than people think. A 300-pixel thumbnail does not contain enough edge detail for a clean mask, and upscaling afterward only makes the rough edges bigger. Use the highest resolution original you have. And check the result at full size before you use it: zoom in on the edges, especially around hands, hair, and anything semi-transparent like glasses or bottles. If the edges look acceptable zoomed in, they will look perfect at normal viewing size.
What to do after you remove the background
Your new transparent PNG is useful, but it has two practical problems: file size and dimensions. PNG files are much larger than JPGs, and a full-resolution cutout can easily be several megabytes, which is too heavy for a website or an online form. Run it through the Image Compressor to shrink the file without visible quality loss. For a web page, aim for under 200 KB. For a profile picture upload, under 500 KB is usually plenty.
Next, fix the dimensions. A 4000-pixel-wide cutout is overkill for a LinkedIn photo or a slide. Use the Image Resizer to scale it to what you actually need: 400 by 400 pixels for most profile pictures, 1280 by 720 for YouTube thumbnails, 1920 by 1080 for full-screen slides. Resizing before you upload also stops platforms from compressing your image unpredictably.
Finally, place your subject on its new background. Many people stop at transparency, but the cutout is just raw material. Drop it onto a solid color, a gradient, or a scene photo in any editor. Product sellers use pure white. YouTubers use bold contrasting colors. If you want the subject on a photographic background, match the lighting direction and add a soft shadow underneath, because a floating cutout with no shadow is the fastest way to make an image look fake.
Background remover vs Photoshop: when to use which
An honest comparison helps here. A free AI background remover handles roughly 95 percent of everyday cutout jobs in under a minute, with no skill required. Product photos, headshots, thumbnails, and slides all fall in this group. If the subject is clear and the background is reasonably simple, the AI result is as good as what most people could produce manually, and it is dramatically faster.
Photoshop still wins in specific situations. Complex composites where you are blending multiple images, fine wispy hair that needs strand-level control, glass and reflections that need manual masking, and client work where pixel-perfect edges are non-negotiable: these justify opening a real editor. A professional retoucher with the pen tool and refine-edge brushes will beat any one-click tool on a difficult image.
The practical workflow for most people is to start with the Background Remover and only open Photoshop if the result is not good enough. Even professionals do this now: generate the AI mask in seconds, then refine it manually instead of drawing the whole selection from scratch. You get the speed of AI and the control of manual editing, and you only pay the time cost when the image actually needs it.
Common mistakes people make
The most common mistake is starting with a low-resolution image. A photo pulled from a social media post or a screenshot of a photo has already been compressed, and the AI cannot invent edge detail that is not there. Always work from the original file on your phone or camera. The second mistake is a busy background in colors similar to the subject: a brown dog on a brown couch, a bride in white against white curtains. No transparent background maker separates those cleanly every time.
Another frequent error is expecting perfection on genuinely complex images. Group photos with overlapping people, a cyclist shot through a fence, a product photo with a reflective surface: these are hard for every tool, including Photoshop. If the AI struggles, simplify the problem instead of retrying the same photo ten times. A different angle, better light, or a plainer background will improve the result more than any setting.
The last mistake is technical: saving the result as JPG. JPG does not support transparency, so the transparent areas become white and the whole exercise is wasted. Always download and keep the PNG version. If file size is a concern, compress the PNG afterward with the Image Compressor instead of converting to JPG. And keep a copy of the original photo too, because you may want to redo the cutout later at higher quality.
Frequently Asked Questions
Is this background remover really free?
Yes. The Background Remover is completely free to use with no hidden charges, no watermarks on your images, and no daily limits on the number of photos you can process.
Do I need to create an account or sign up?
No. There is no signup, no login, and no email required. Open the tool, upload your photo, and download the result. That is the entire process.
Which image formats can I upload, and what do I get back?
You can upload JPG, PNG, and WebP images. The result is always a PNG file with a transparent background, because PNG is the format that supports transparency. Keep it as PNG: saving as JPG would fill the transparent areas with white.
Is my photo uploaded to a server? Is it private?
Your photos are processed only to remove the background. ZaxisMedia does not require an account, does not tie images to your identity, and does not store or share your photos.
How accurate is the AI cutout?
Very accurate for clear subjects: people, pets, products, cars, and logos usually come out clean on the first try. Tricky areas like loose hair, fur, glass, and fine translucent edges may show small imperfections. For those, start with a well-lit, high-contrast photo, which fixes most issues before they happen.
Can I remove bg online from any image?
Almost any photo with a distinguishable subject works: portraits, product shots, animals, vehicles, and objects. Images where the subject blends into the background in both color and texture are the hardest, as are group photos with overlapping people. For best results, use the original high-resolution photo rather than a compressed copy from social media.
What resolution will the transparent image be?
The output keeps the resolution of your uploaded photo. A 2000-pixel-wide upload gives you a 2000-pixel-wide transparent PNG. If you need a specific size afterward, scale it with the Image Resizer before uploading it to a website or profile.
Can I use the cutout images commercially?
Yes. The photos are yours, and the tool claims no rights over them. You can use the transparent PNGs in product listings, advertisements, thumbnails, presentations, and client work. Just make sure you own the rights to the original photo itself.
Remove your first background in seconds
Upload any photo and get a clean transparent PNG instantly. Free forever, no signup, nothing to install.
Open Background Remover